New Xton Documentation Center
Xton help has moved. Please visit the current version of this page for the most recent updates. Our new documentation center can be found at help.xtontech.com.
How to change XTAM from a basic login prompt authentication to a login page
If you did not include the Federated Sign-In Services (CAS) component during the installation, this basic pop-up prompt is the expected login behavior. This basic pop-up prompt is secure and is designed to handle both local and domain (if configured on the server) user authentication functionality. You can login with this pop-up prompt using your xtamadmin user and the password you have created during the installation and to proceed to use XTAM’s functionality. This basic authentication is a valid option for all types of deployments that do not require advanced authentication options like MFA or SSO.
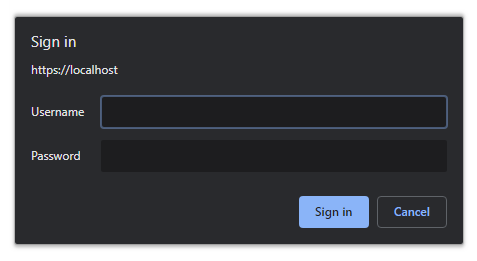
If you would like to switch your XTAM deployment to display a more traditional login page instead of the pop-up dialogue to authenticate users (optionally with MFA or SSO options), you need to install XTAM with its included Federated Sign-In component or deploy it after the installation as described in this article below:

https://www.xtontech.com/resources/faq/federated-sign-in/
Please note that to support the Federated Sign-In login page experience, you will need to access XTAM using a proper URI (not default localhost or an IP address) with a valid SSL certificate trusted by browsers, unlike the included self-signed certificate that generates browser warnings. Below is the article describing how to replace XTAM’s default self-signed certificate with the trusted one obtained for the proper URI you assign to XTAM (such as xtam.company.com).
https://www.xtontech.com/resources/faq/replacing-self-signed-certificate-with-trusted-certificate/